The Radio Tower
Since I got back into Amateur Radio (Ham Radio) I have been wanting to put up a tower to mount my antennas on. I had been making due with some homemade antenna mounts using PVC pipe. Over the summer the pipes started to bend with the heat and weight of the antennas.
I had been looking around for a used antenna from a silent key (Amateur radio Operator that has passed). I found one on Craig's List that was never even put into the ground. It had 4 10 ft sections and the ground post.
This is not a really big antenna tower and looks very similar to a lot of old TV antenna towers. It is built a bit stronger than those but from a distance it really looks the same.
With the help of my brother in law and step father, the first saturday it got stood up, mounted to the house, guy wires connected and cemented into the ground. A couple of antennas were mounted but most were put up a couple of weeks later.
First Week (CLICK TO SEE FULL IMAGE)
As you can see we used a rented pull behind man lift which made the process so much easier. We basically assembled the tower on the ground and used the lift to pick it up assembled and lifted it into the 3 ft hole. After getting it mounted to the house and putting cement in the hole, things like the guy wires were added and just a few antennas.
2 weeks or so later the rest of the antennas were added. Again we rented the tow behind man lift from Rentals Unlimited. That makes it so quick and easy. It is $250 to rent for the day but it is worth it. That Saturday I also had the help of my Father In-Law with some of the grunt work like digging holes, etc.
BTW... I did not mention that I got the 40ft tower and the base for $400. That is really inexpensive. The only problem is I do not know who the manufacturer is.
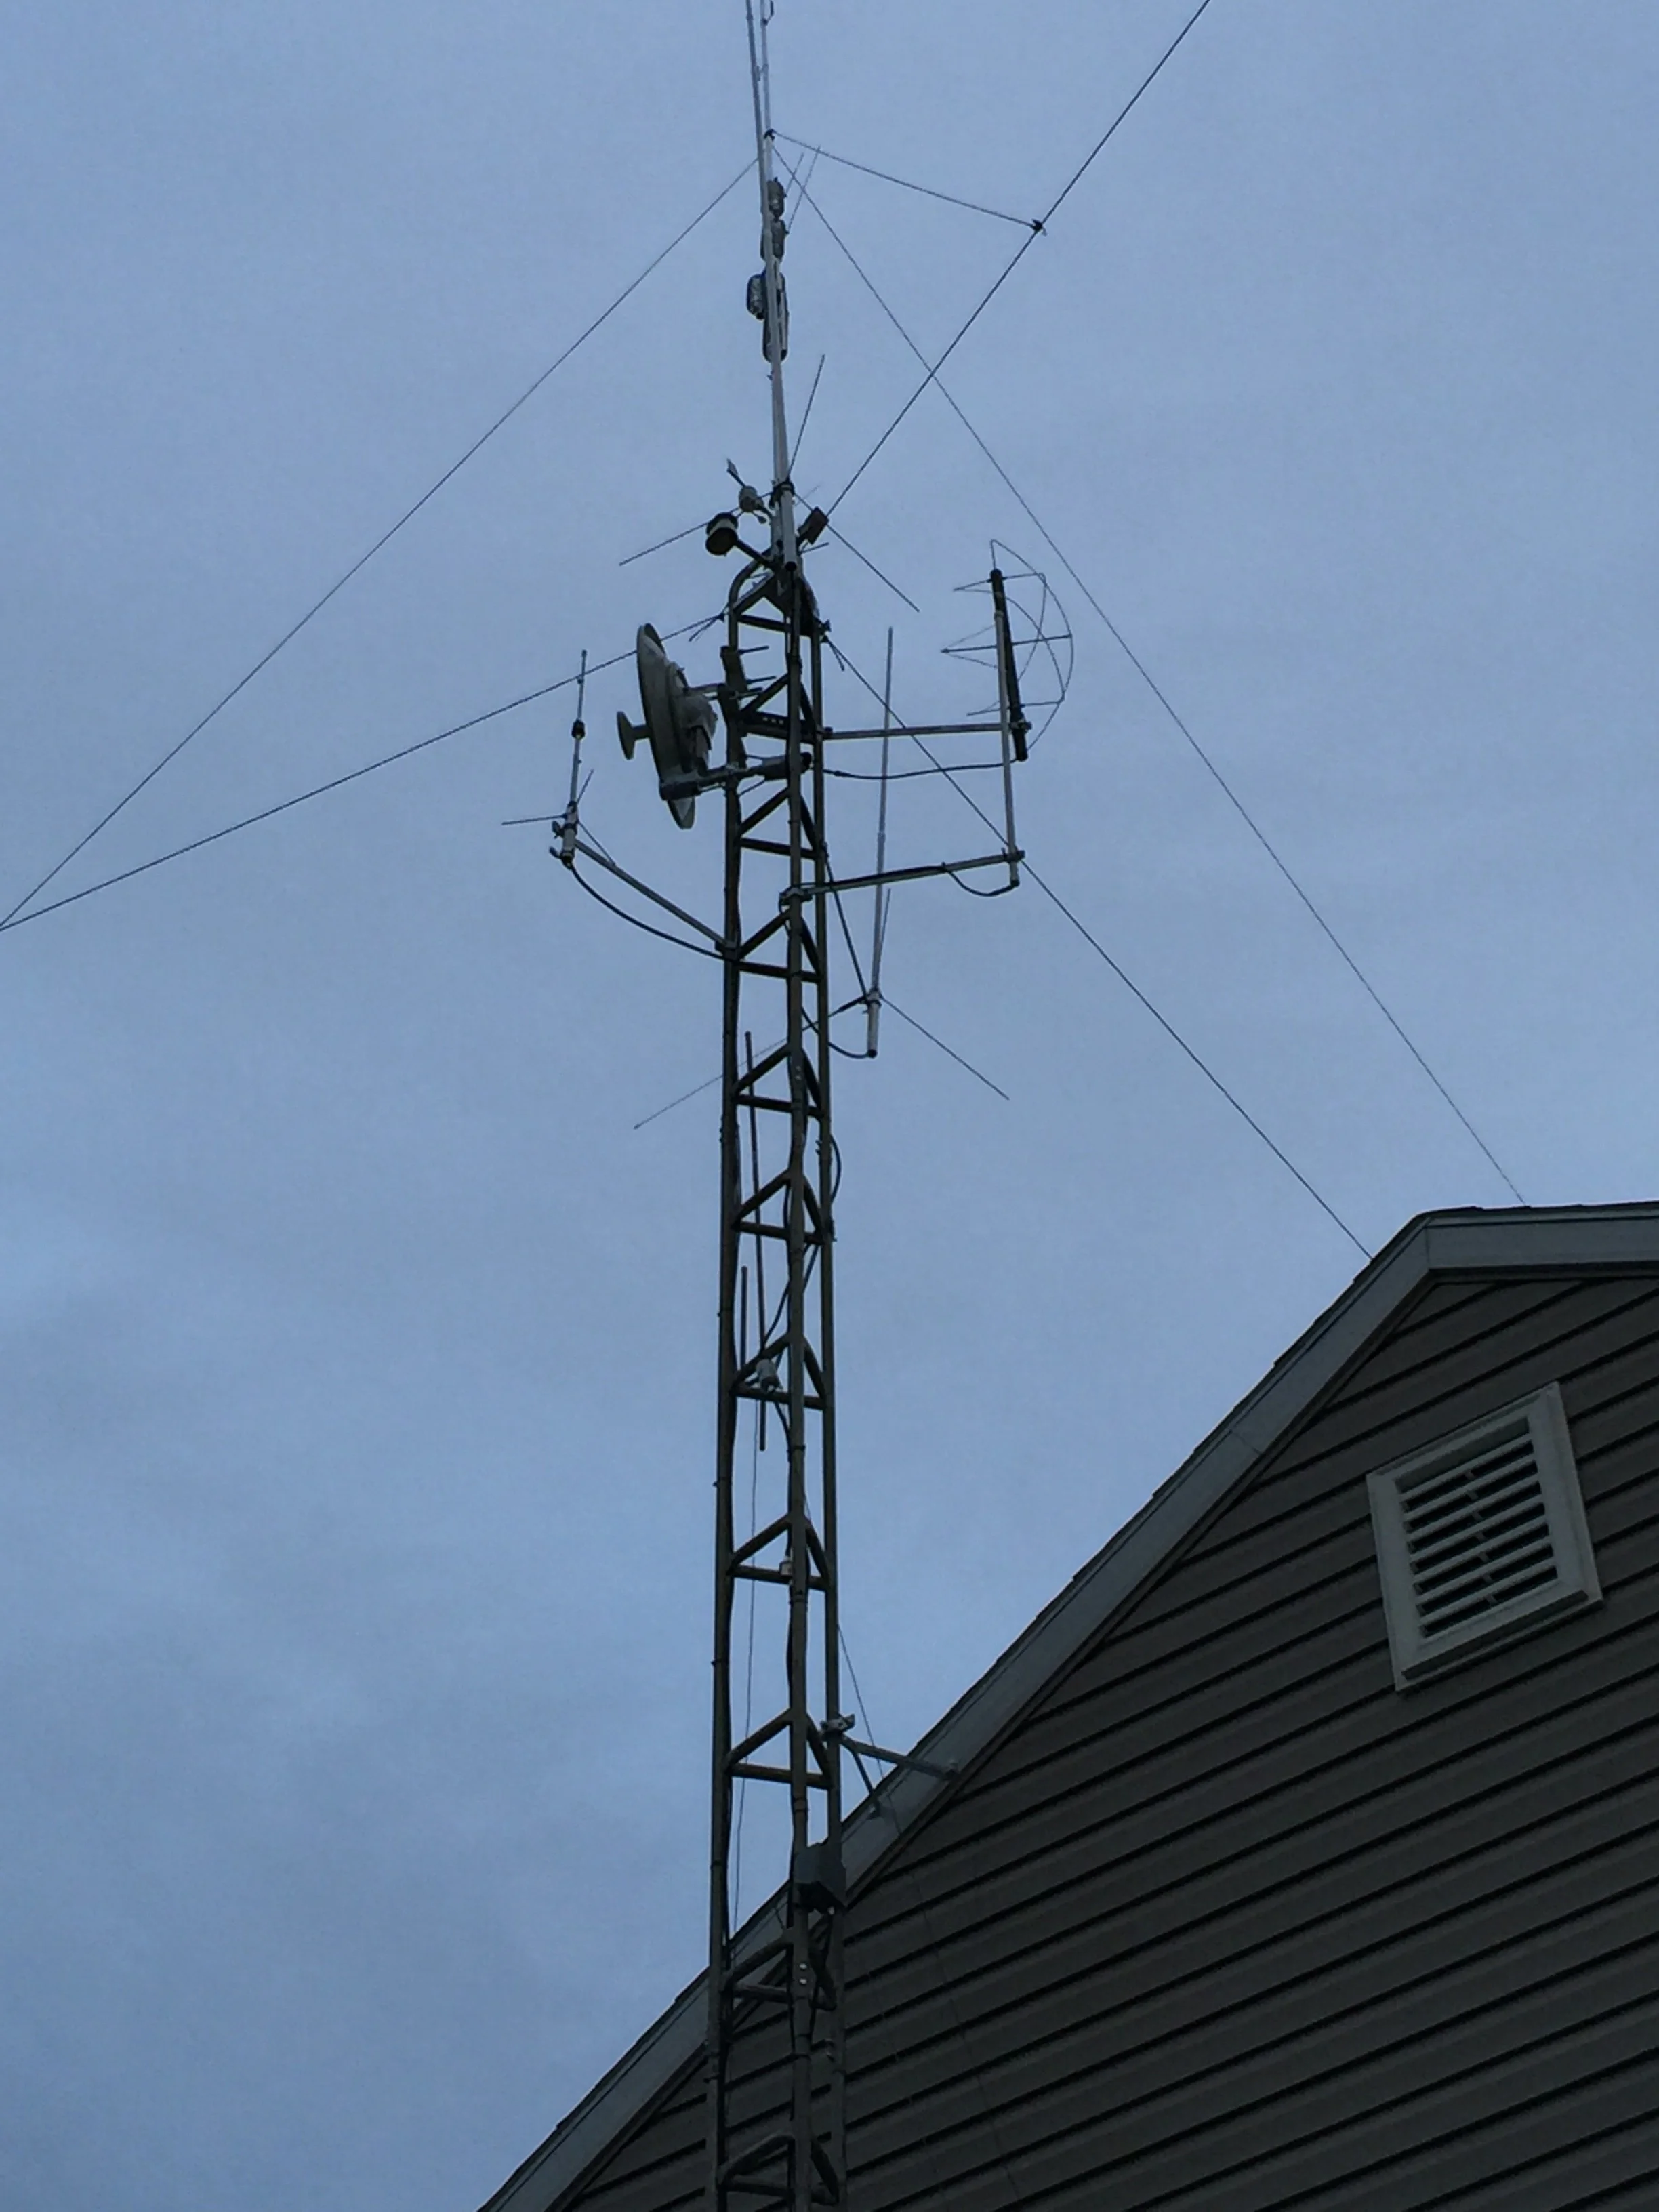
Here are pictures from the completed installation on the 2nd Saturday:
CLICK FOR FULL IMAGE
CLICK FOR FULL IMAGE
You will notice the large bundle of cables at the bottom that look like a mess. I did clean that up:
CLICK FOR FULL IMAGE
This is the last picture I took. There is still some cleanup needed in this picture, I did manage to clean it up some more after this picture was taken. I am still considering adding another 10 or 20 feet to the tower so I have not shortened the cables yet. If I can ever figure out who the manufacturer is I might grow the tower another 20 feet.
Everything has been grounded and those thin cables you see running into the house have now been replaced with LMR-400 cables to match what is running up the tower.
The main reason I am still wanting to add some height is I am close to the top of a hill, I need just a little more height to get a clear view over the hill. Particularly for the RocketDish to the MAIPN network. It is pointing directly at the front of a Catholic Church:
That image is from a camera that is mounted directly below the RocketDish and pointing the same direction. Just after church the ground drops off into a valley so the church and the few trees around it are what would be impacting my connection to Braddock Heights MAIPN POP.
Here is what I have mounted on the tower as of the time the pictures were taken:
- The dish is a Ubiquity RocketDish with a Rocket M5 radio that is pointing towards Braddock Heights MD where there is a MAIPN node.
- At the very top is a 7 band HF vertical antenna. In the spring I am considering replacing it with a 3 band beam and moving this to the ground. I have found that this works better with the ground plane actually in the ground vs being high on a tower.
- There is a 3 band (6m, 2m, and 70cm) on the right top of the tower. This is currently connected to an ID-880h and is my main D-Star radio when I am not using a hotspot.
- There is a 2 band (2m/70cm) on the top left. This is connected to a 50 Watt TYT 9800D and is my primary 2M/70CM FM radio.
- There is a QFH antenna for receiving weather satellites.
- There is a 440 antenna and a 2m Jpole that are connected together with an MFJ combiner. This is connected to a Yeasu radio that is used for experimenting with digital data mostly. It will be the radio for the high power hotspot and can do packet, etc.
- There is a homemade antenna for receiving ADSB data from airplanes.
- It is hard to see but there are also 2 ubiquity IP cameras just under the dish. One facing the same direction as the dish and the other one facing the opposite direction.
- There is a Oregon Scientific anemometer, wind direction and temperature and humidity sensor.
- Down the tower a little bit there is a 80 meter dipole mounted.
- Not too far below that there is a 40 meter wire antenna (gray box).
- A little further down are 3 mag mount antennas for 2m/70cm on ground planes. These are mainly used for experimenting and other random things. For example:
- One is connected to a 10 watt VV-898 and used for monitoring or listening to things like APRS, etc.
- One is connected to an ID-880h and is mainly used to connect to my local hotspot and do some packet radio.
- One is connected to the my local Open Repeater Project test system.
- Below the 3 mag mount antennas, there is another grey box, this houses a raspberry pi that has a SDR dongle that is connected to the homemade ADSB antenna at the top.
- You will also see a Ubiquity 5Ghz AC Sector Antenna pointing into the house, this is for testing the Ubiquity gear. I will do a post at a later time on that project.
If you want to learn a little more about my Amateur Radio hobby, you can visit the Amateur Radio page under the Projects and Hobbies menu item or just click here.
If you are not an Amateur Radio operator I strongly suggest you check it out. There is no Morse code requirement any more and the radios are dirt cheap. The thing is, they will work when the Internet or Cell Phones don't.
Update:
Here is the picture from the other camera mounted on the tower, you will see my homemade ADSB antenna in the picture.